
How to Fix Bad Light at Your In-Home Newborn Session

This image was captured with just one flash, bounce off a window and it looks like natural light!
Has this every happened to you?
You walk into your client’s home.
You’re greeted warmly. The baby is sleeping. Everyone is excited.
And then you see the light.
Small windows.
Dark walls.
Overhead fixtures casting yellow shadows.
Green trees reflecting green light into the room.
Your stomach drops.
If you’ve ever felt that moment of panic at an in-home photo session, I want you to hear this clearly:
This doesn’t mean you’re a bad photographer.
It means you’re working in a real home.
And real homes weren’t designed for photography.
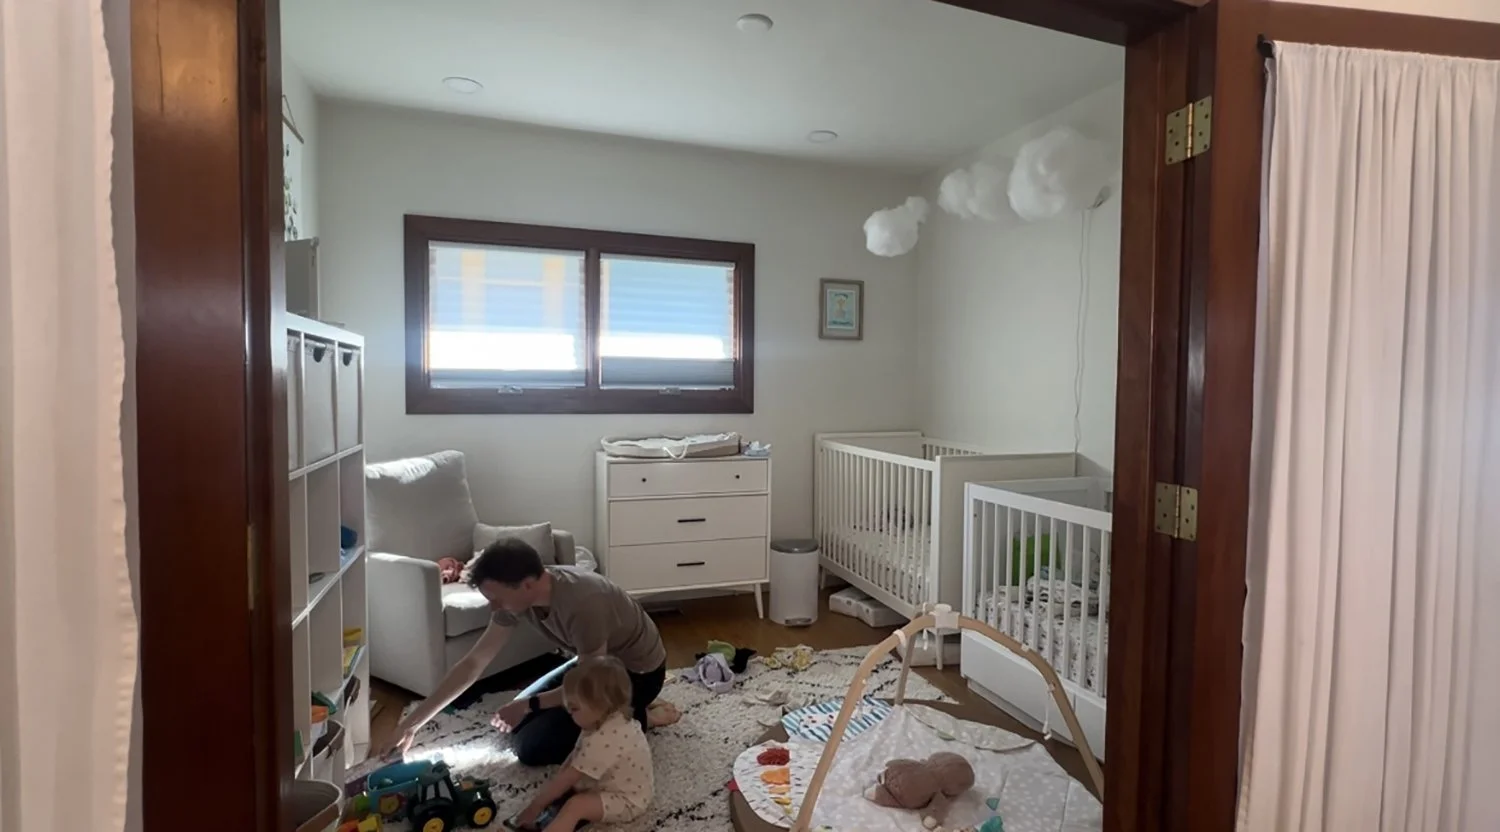
As an in-home photographer, not every room you walk into is perfect. But that doesn’t mean that your photos can’t be. Just one flash can transform this space into something magical!
First: Don’t do This!
When the light is bad, most photographers react in one of four ways:
Crank up the ISO and hope for the best
Avoid certain rooms
Reschedule the session (which costs time and money)
Promise themselves they’ll “fix it in editing” and just try to make it work
These solutions might fix the problem in the short term, but they don’t fix the real issue, and will most likely result in an unhappy client, and nobody wants that!
Why In-Home Lighting Feels So Unpredictable
There are so many benefits to working in your client’s homes. It’s convenient for you and your client. It creates memories in their personal space. And it’s free! No studio rent required.
But the problem is, it’s unpredictable.
In a studio, you control:
The background
The light placement
The ambient environment
The amount of space you’re working with
In a client’s home, you are walking into a new space ever time.
You may encounter:
A nursery with no windows
A bedroom where the window is behind the bed
A basement with green walls
A tiny room with no space
And so you need a system that gives you the skills to create perfect light with minimal gear regardless of the environment you are asked to work in.
My 3-Step Plan for Handling Bad Light
When I walk into a home and the light isn’t ideal, I don’t panic.
I assess.
Here’s the simple 3-step process I use every time.
1. Look at the Direction of Light
Look at where the light is coming from.
Is it:
Below the baby’s face (creating ghoul lighting effect)?
Directly overhead, causing deep shadows in the eyes?
Unflattering in anyway?
Or is it:
Falling on my client in a way that looks good?
Casting even light on all of my subjects?
If the light is flattering, I know I can use the natural light. If it is not flattering, I know I need to redirect it with my flash.
2. Check for Color Cast
Are trees bouncing green into the room? Are red or blue walls reflecting pigment onto skin? Is overhead lighting causing an orange cast?
Or is the light neutral and clean?
If the light is neutral, I’ll use the window light. If I see a color cast or unpleasant light temperature, I’ll bring in a flash.
3. Decide: Can Natural Light Do the Job?
Do I have enough light for proper exposure?
If the window is large, positioned well, and creating a flattering pattern, I’ll use it.
But if it’s too dim, too harsh, or poorly positioned?
That’s when I bring in one light.
The One-Light Fix for In-Home Newborn Photography
If I’ decide to use a flash for any of the above reason, I use a simple set up!
Trust me, you do not need a ton of gear to fix bad lighting in a client’s home.
All you need is:
One flash or strobe
A stand
An umbrella (and a lot of times I don’t even use that!)
Why This Changes Everything
When you know how to fix bad light, three things happen:
You stop fearing in-home sessions.
You stop relying on perfect weather to set your schedule
You stop feeling at the mercy of the environment.
Confidence changes how you show up.
It changes how you speak to clients.
It changes how you market yourself.
It changes how you feel about your prices.
It changes how often you book.
Because now you can confidently say: “Yes, I photograph in homes.” Even when the light isn’t ideal. And you know that your clients are getting your best every single time you pick up the camera!
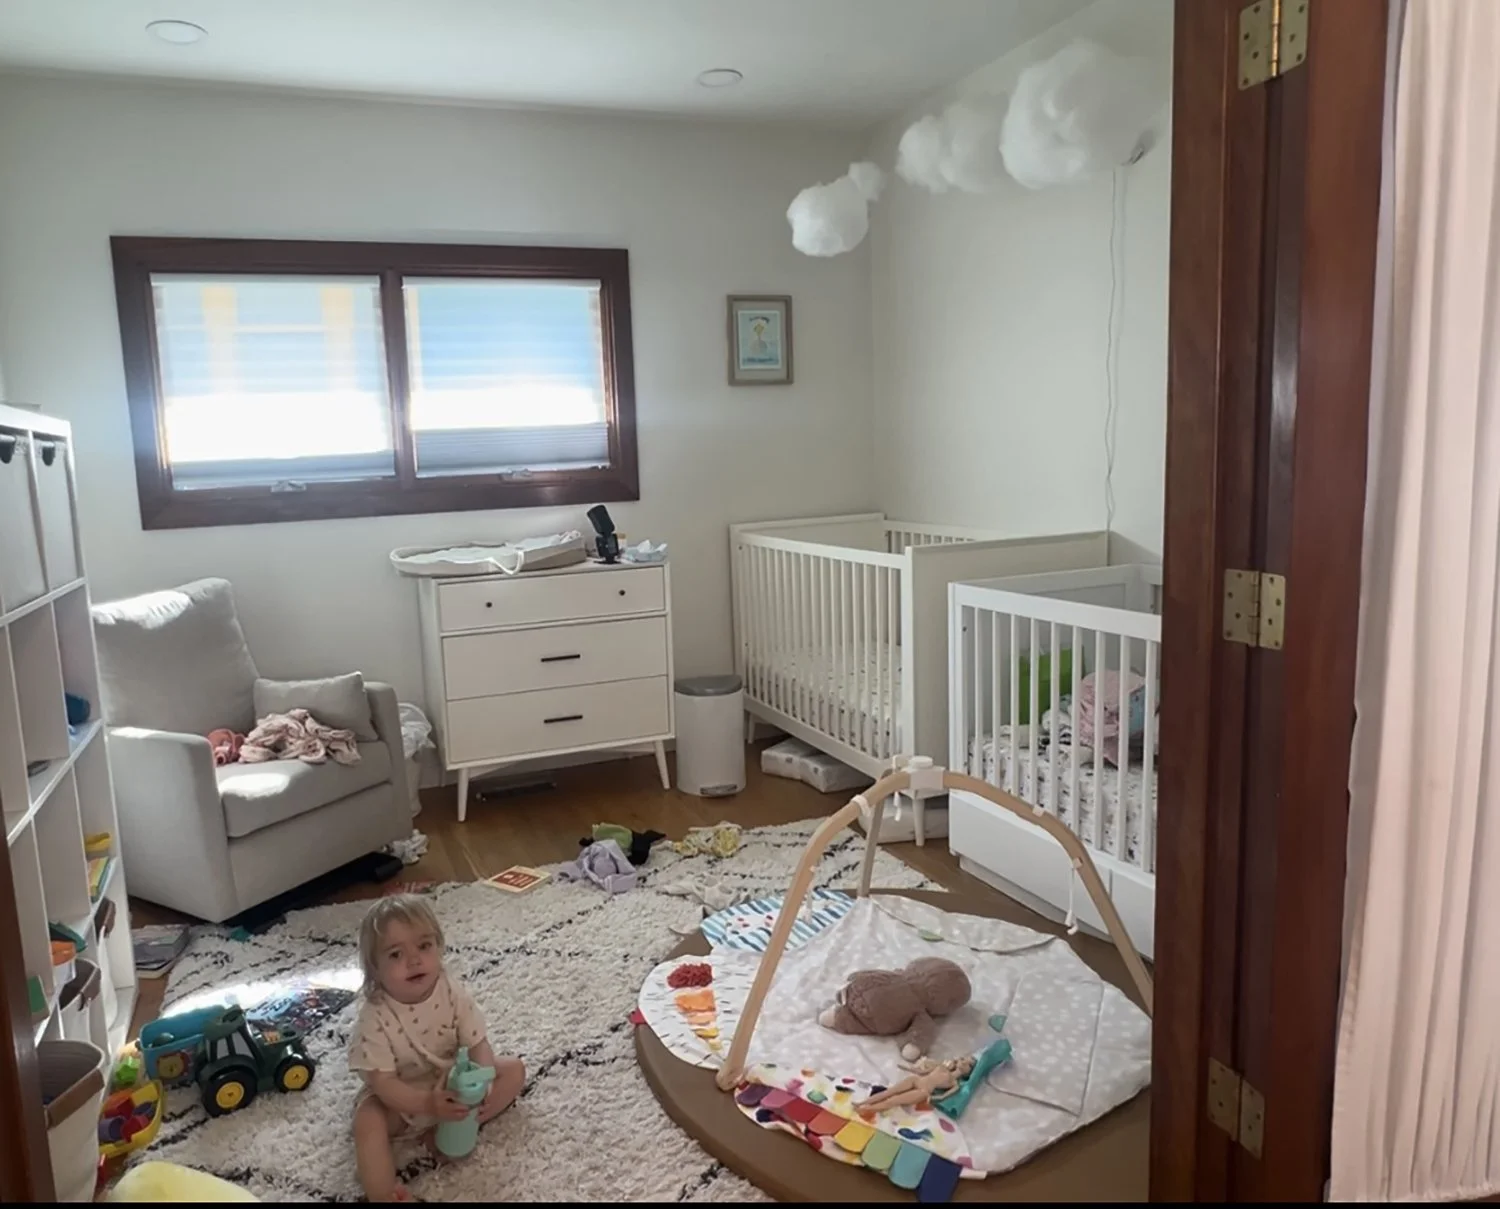
I lit this entire room by bouncing the light for flash you see on the dresser off the windows! It’s so simple, and works like a charm!
How to Go From Fearing Flash to Mastering In-Home Lighting
Understanding how to handle difficult lighting in the moment is powerful.
But if you want to go from just making it work to creating consistent, beautiful in-home newborn and family images every single time, you need more than quick fixes.
You need:
A reliable lighting system
Repetition with that system
Confidence in your placement and decisions
That’s exactly what I teach in my class:
Lighting on Location: Off-Camera Flash for In-Home Photographers
This is the same one-light approach I use in my clients’ homes
Inside the class, you’ll learn:
How to assess any room quickly and confidently
When to use natural light and when to add light
What equipment you need (and what you don’t need)
Where to place your light first so you always start strong
How to bounce flash for soft, beautiful skin tones
How to fix shadows, color cast, and direction issues with one light
How to create natural-looking light in any home, day or night
This isn’t about overpowering natural light.
It’s about enhancing it.
It’s about walking into a client’s home and knowing exactly what to do.
If you’ve ever wished you could stop feeling at the mercy of lighting and start feeling in control, this class will give you that foundation.
You can learn more about Lighting on Location AND get it for 50% off by following this link.
Because once you understand how to handle bad light with intention, slow seasons become less stressful, in-home sessions become easier to book, and your confidence grows with every door you walk through.
And that changes everything.