
How to Create Natural-Looking Light with One Flash (Complete Beginner’s Guide to Flash Photography)
If you’ve ever said to yourself or to your clients, “I’m a natural light photographer”, you’re not alone.
Most family photographers love natural light. We love the ease. We love the softness. We love the feeling.
But the reality is, natural light isn’t always available.
Some homes are dark.
Some rooms have tiny windows.
Sometimes it rains.
Sometimes sessions happen at 2pm in a basement nursery.
And this is where being a “natural light photographer” can get you stuck.
The good news?
You can create your own natural light with strobes and flash.
You don’t need a studio.
You don’t need five lights.
You don’t need a ton of expensive gear.
You can create beautiful, natural-looking light with just one flash.
This guide will show you how.
What Does “Natural-Looking Flash” Actually Mean?
So what do I mean when I say “natural-looking light”? After all, natural light can look many ways.
When I say “natural-looking light” I mean:
Light that appears to come from a believable direction. Like it’s coming from the perfect window.
Soft transitions between highlights and shadows
Clean, neutral color
Catchlights in the top half of the eye
No harsh, specular hotspots. We don’t want that harsh “flashy” look
In other words, light that looks like beautiful window light, even if it isn’t.
And creating that kind of light comes down to know just three things!
Your lights size, placement, and control.
The Equipment You Need
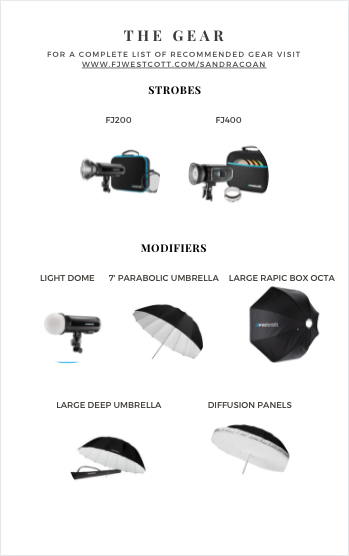
Click to download my equipment list.
To create natural-looking light , you need to make sure you have the right equipment. Luckily, you don’t need a lot.
All you need is:
One strobe or flash
One large modifier (and sometimes you don’t even need that)
A light stand
A trigger (so that your flash can communicate with your camera)
(Optional but recommended) a handheld light meter
That’s it.
You do not need:
Multiple lights
A giant studio
Complicated ratios
Overly technical formulas
Grab my complete equipment list here!
Step 1: The Size Of Your Light
The size of your light source impacts the quality of the light it produces.
Large light sources create soft light.
Small light sources create hard light.
A large window, for example, creates soft light.
To replicate that softness with flash use a large umbrella on your flash (45–60 inches minimum) or bounce your flash off a large surface (wall, ceiling, or window)
When you bounce flash off a wall or ceiling, that surface becomes your light source.
A large white wall = large soft light.
Step 2: The Placement Of Your Light
When working in client homes, I always start by setting my light up on the window side of the room.
Why?
Because that’s where natural light normally comes from.
Our brains are used to seeing light enter from windows. When you place your flash on that side of the room, the light feels believable.
If the room has windows:
Place your flash near the windows
Aim it to mimic the direction of natural light
Bounce off the ceiling or windo if needed
If there are no windows:
Create your own “window” by placing a large umbrella on your flash.
This simple placement decision is what makes flash look natural instead of artificial.
Step 3: The Direction Of Your Light
The way your light falls on your subject has a huge impact of the look and feel of your photos, so create it with intention.
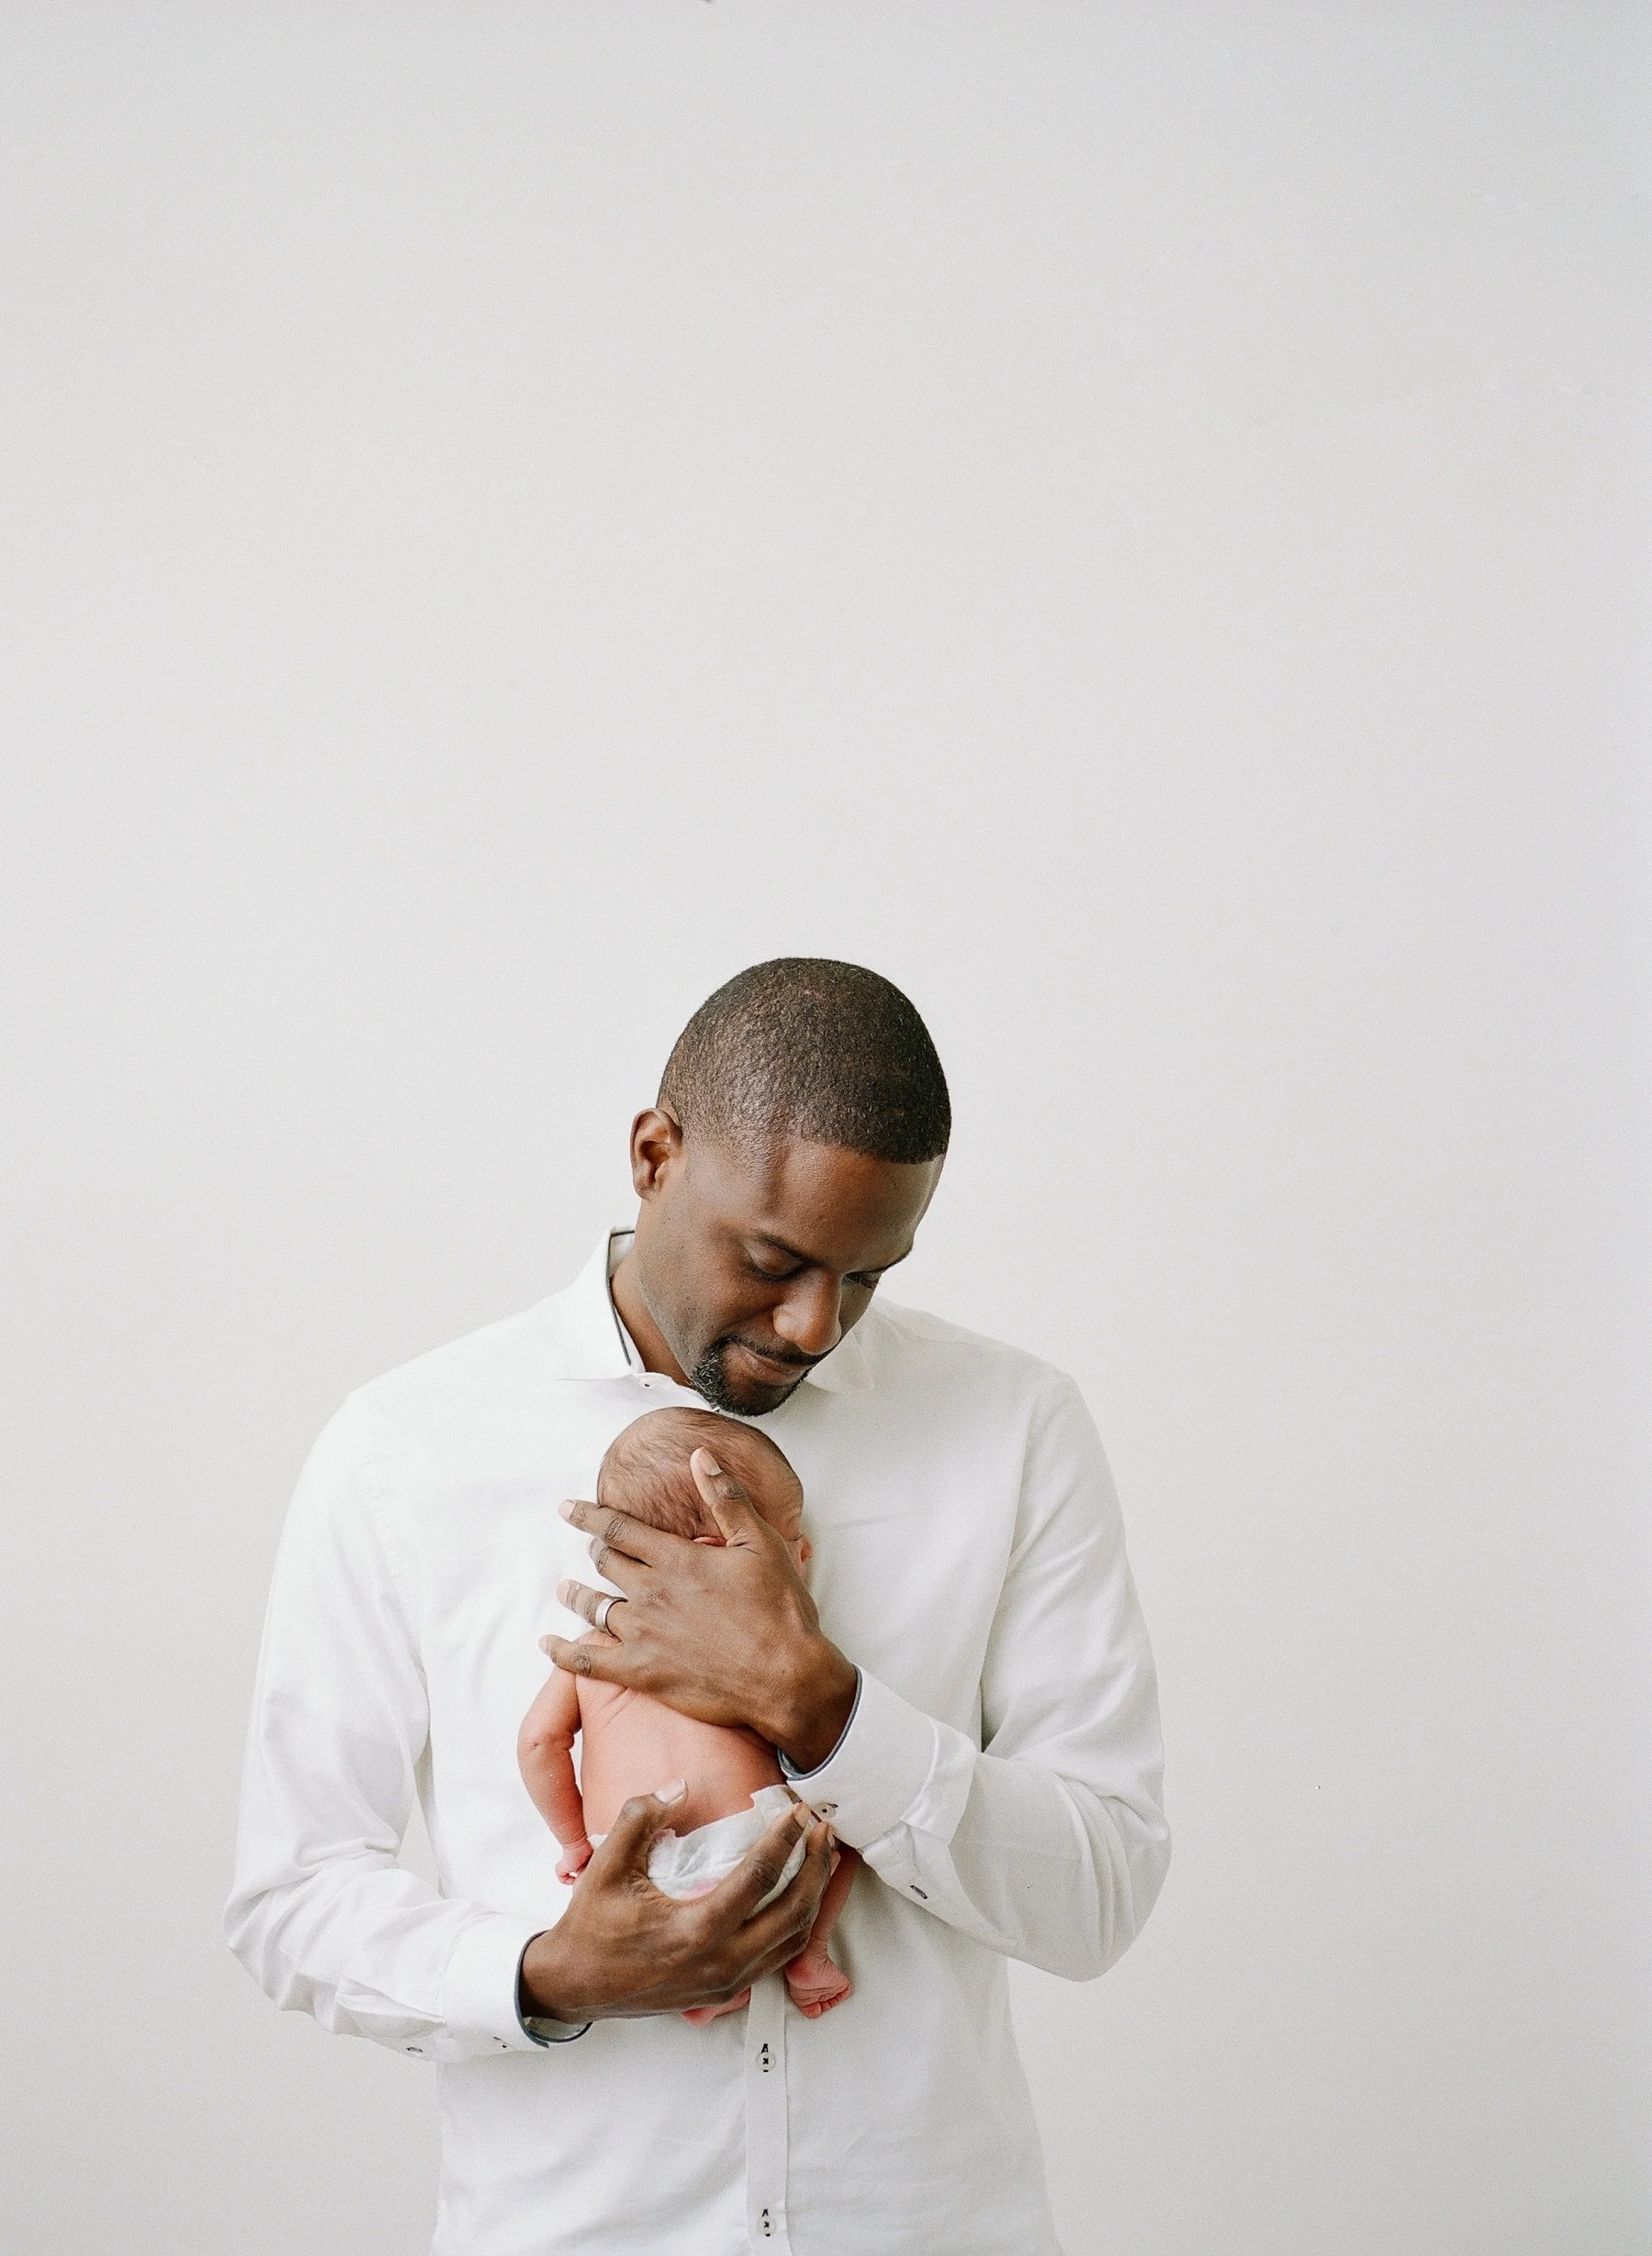
For family photography, I recommend starting with Loop Light.
Loop lighting is a pattern that:
Creates gentle shadow under the nose
Adds dimension without harsh contrast
Works beautifully for parents, babies, and groups
To create Loop Light with one flash:
Place your light about 45 degrees from your subject
Raise it slightly above eye level
Angle it downward
Then check the catchlights. Catchlights, the specular bit of light in the eye, should appear in the top half of the eye. If the catchlights are in in the bottom half, your light is too low (this creates “ghoul lighting,” which is not flattering).
Step 4: Adjust Power For Proper Exposure
Getting the proper settings when using flash intimidates a lot of natural light photographers. But it doesn’t have to be complicated.
When using flash simply:
Choose your ISO (I prefer working at ISO 100 or 200 to reduce digital noise)
Select a shutter speed that is below your sync speed (I keep mine at 1/200)
Choose your aperture based on your style. I like a shallow depth of field and often work at f2.8
Adjust flash power until exposure is correct. It really is that simple.
Can You Really Create Natural Looking Light With One Flash?

Yes.
In fact, one light forces you to understand direction and quality.
Most natural-looking portraits, even in studios, rely on a single dominant light source.
The key to creating your version of “natural-looking light” is:
Size
Placement
Direction
The Bottom Line
You don’t need to be intimidated by artificial light.
You don’t need a studio.
You don’t need a complicated setup.
You don’t need to stop calling yourself a natural light photographer.
You just need to learn how to create your own natural light when the real thing isn’t cooperating.
If you’d like help going deeper, I teach this step-by-step inside my course:
Lighting on Location: Off-Camera Flash for In-Home Photographers
It’s currently 50% off ,and designed specifically for family photographers working in real homes, not giant studios.